For the past few weeks, we've really been working on taking the dogs for walks more frequently (and by "more frequently" I mean "at all"). Because we have a fenced in yard, the dogs get plenty of exercise chasing one another around. But we know that not only is a walk good physical exercise, it's also mentally stimulating for dogs and we know that a tired dog is a good dog. Hence, the walking.
Because of the crazy rain we've had lately, last night was the first walk we've taken since time changed. By the time we got home from work, fed the dogs, fed ourselves, and tidied the kitchen, it was well after dark. We weren't too worried, because we have street lights and the park where we walk the dogs is well lit as well. So we bundled the dogs in their jackets, attached the requisite halters, haltis, and leashes, and off we went.
Everything went quite well until we were about two houses away from returning home. Then, you guessed it... Code Brown. On our neighbor's lawn. So I pulled a poop bag from my pocket, handed Gypsy's leash to Meg, and leaned over to make my pick up.
Except.
It was dark. And there were fallen leaves everywhere. I could smell it (boy could I smell it) but I couldn't see it. So I looked. And I looked. Nothing. But that smell. That's when I noticed that not only was my neighbor home, but she standing outside watching us. Oops.
Note to self: Dig around the camping gear and find the headlamps.
Second note to self: Stop feeding Maisey so much broccoli, that sh1t stinks.
Thursday, November 5, 2009

Wednesday, November 4, 2009
Gypsy, Al Fresco
I use Photobucket to store and edit my digital photography. I find it easy to use and organize (and it's free until you get to large amounts of storage, and even then the price is reasonable).
One of my favorite applications is "fresco" which essentially takes a photo and makes it look like a fresco painting. It's especially good if you get a great pic that turned out slightly blurry, because the frescoing process makes it beautiful.
Here are some of my favorite pics of Gypsy, al fresco.


One of my favorite applications is "fresco" which essentially takes a photo and makes it look like a fresco painting. It's especially good if you get a great pic that turned out slightly blurry, because the frescoing process makes it beautiful.
Here are some of my favorite pics of Gypsy, al fresco.


Tuesday, November 3, 2009
World's Largest Chihuahua
Last year for Christmas, Meg's mom gave us a Doggie DNA kit. Meg, ever the scientist, was thrilled. You see, Gypsy is truly a mutt's mutt. She really doesn't look like anything in particular. So, we dutifully swabbed each of Gypsy's cheeks, dried the samples, and returned them to the "lab".
I should mention that Gypsy weighs 36 pounds. A very svelte 36 pounds.
A few weeks later, much to our surprise, we received the following certificate. Look very carefully at the last line.

Gypsy's reaction:
Chihuahua? Chihuahua?
I ain't no stinkin' chihuahua!

Maisey's reaction:
She's a what? Huh?
(Okay to be fair, we didn't even adopt Maisey until a few months later....)

Lucky's reaction?
Well, he just laughed and laughed.

In case you've never met Gypsy in person, here's a photo of her laying next to a FULLY GROWN PIT BULL.

Gypsy, the World's Largest Chihuahua

I should mention that Gypsy weighs 36 pounds. A very svelte 36 pounds.
A few weeks later, much to our surprise, we received the following certificate. Look very carefully at the last line.

Gypsy's reaction:
Chihuahua? Chihuahua?
I ain't no stinkin' chihuahua!

Maisey's reaction:
She's a what? Huh?
(Okay to be fair, we didn't even adopt Maisey until a few months later....)

Lucky's reaction?
Well, he just laughed and laughed.

In case you've never met Gypsy in person, here's a photo of her laying next to a FULLY GROWN PIT BULL.

Gypsy, the World's Largest Chihuahua

Sunday, November 1, 2009
Sunday Crafts - Pastels!
Today I decided it would be fun to create some custom art for our living room. The great part about this project is I got to chose the subject matter, color scheme, and size. I'd love to do this type of project for a nursery.

To do this project, you're going to need supplies. Most of this stuff can be found at an art supply store. Start with a pad of paper designed for pastels (ask for help if you're not sure). Remember the size paper should be larger than the piece of art you want to end up with.
You'll also need a box of pastels (sort of like colored chalk, but with much deeper pigments), a charcoal pencil (I used a 6B extra soft), a fine tip Sharpie permanent marker, a gum eraser (these are grey in color and kneadable). It's also helpful to have a white art eraser (I like Factis brand). If you don't already have one, pick up a little pencil sharpener. Perhaps most important, you need a can of cheap hairspray. Aqua Net is the gold standard.

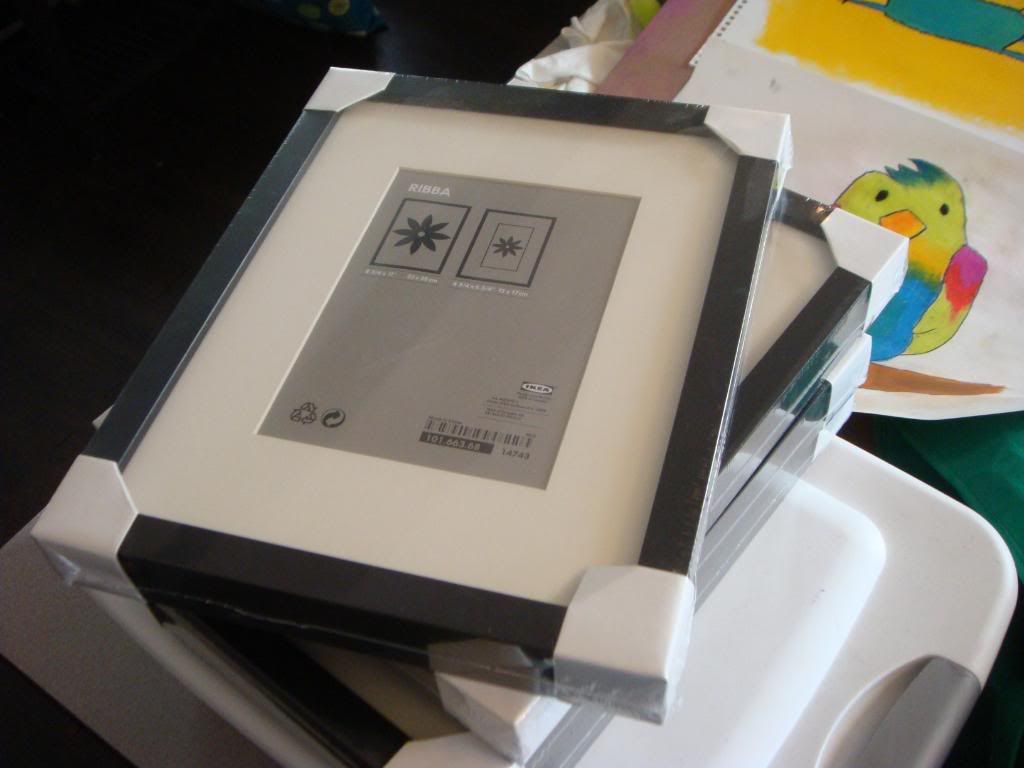
And of course, a set of frames. Ikea has frames that are quite cheap.

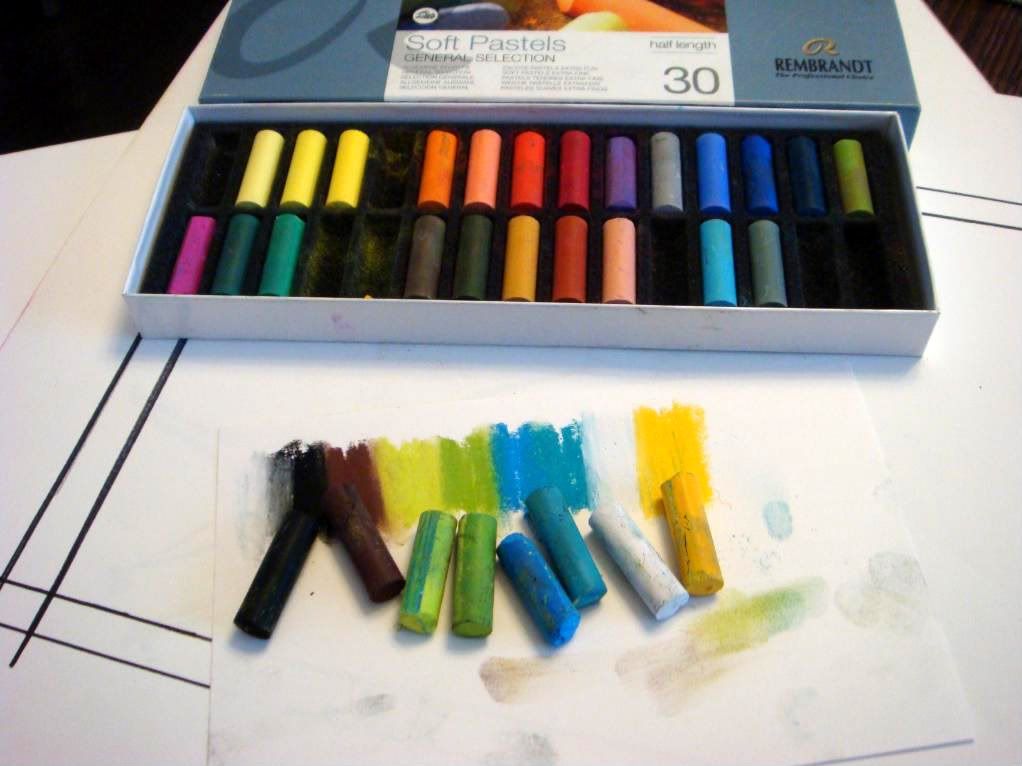
If this is your first pastels project, you will be tempted to use every color in the box. This is a mistake. For this project, choose a limited color scheme. I chose 2 blues, 2 greens, yellow and black.

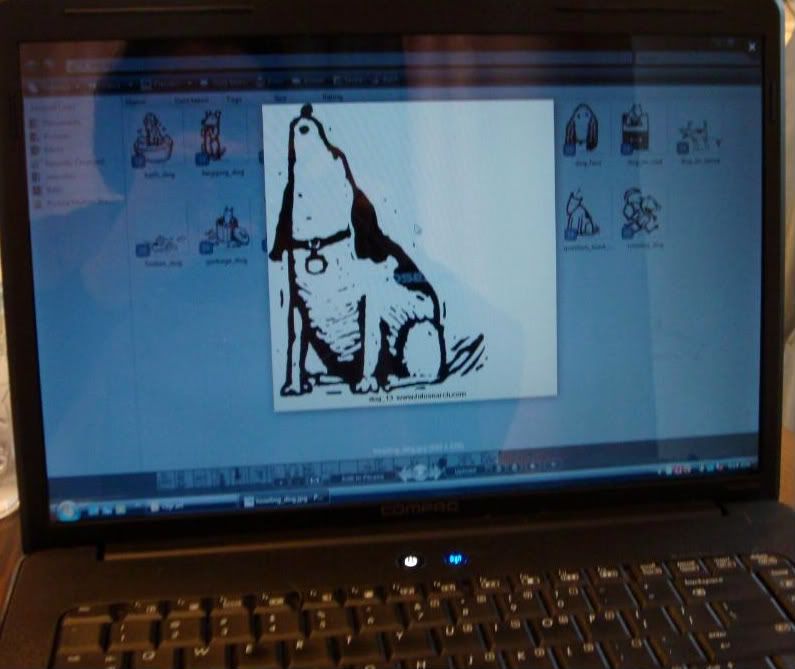
Next find your source of inspiration. I decided to go with a dog and cat motif and found line drawings (clip art) on Google Images. You can also use images from a coloring book or your imagination. It's helpful if your source material is simple line drawings.

Now, create a template - which is the outline of the size of the art you want to make. You'll know this by looking at your frame. Once you know the right size, color the lines with dark Sharpie marker.

When it's time to draw, you'll slip this template under your paper.

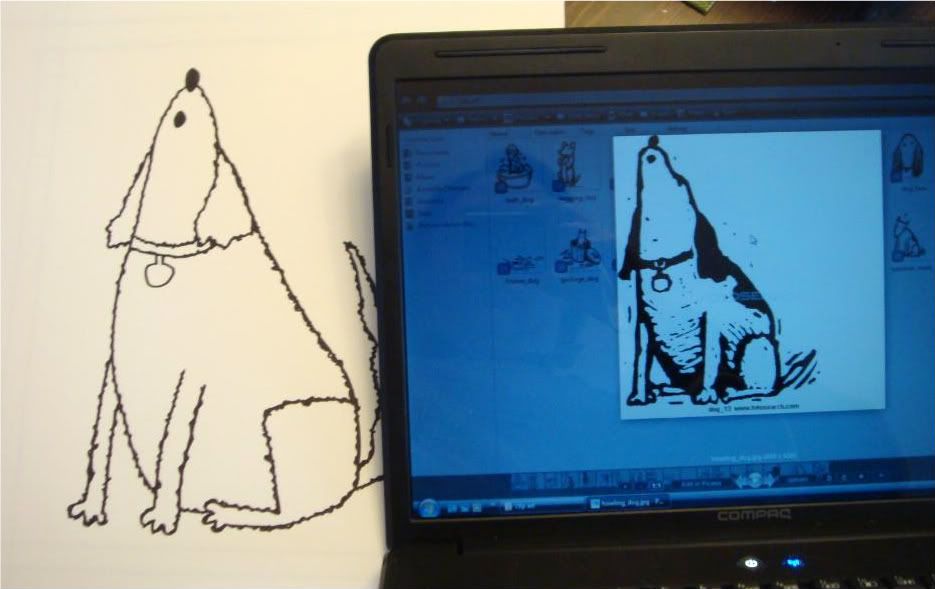
Now, let go of your ego and perfectionism and just do a simple line drawing of your image using your Sharpie marker (DO NOT use the charcoal pencil for this part). As you can see from my sample below, it does not look exactly like the source image, nor should it. Put your personal spin on it. At this point, do not do any shading or color fill. That comes later.

Once you have completed your drawings, slip the template back under the image. It's time to color!

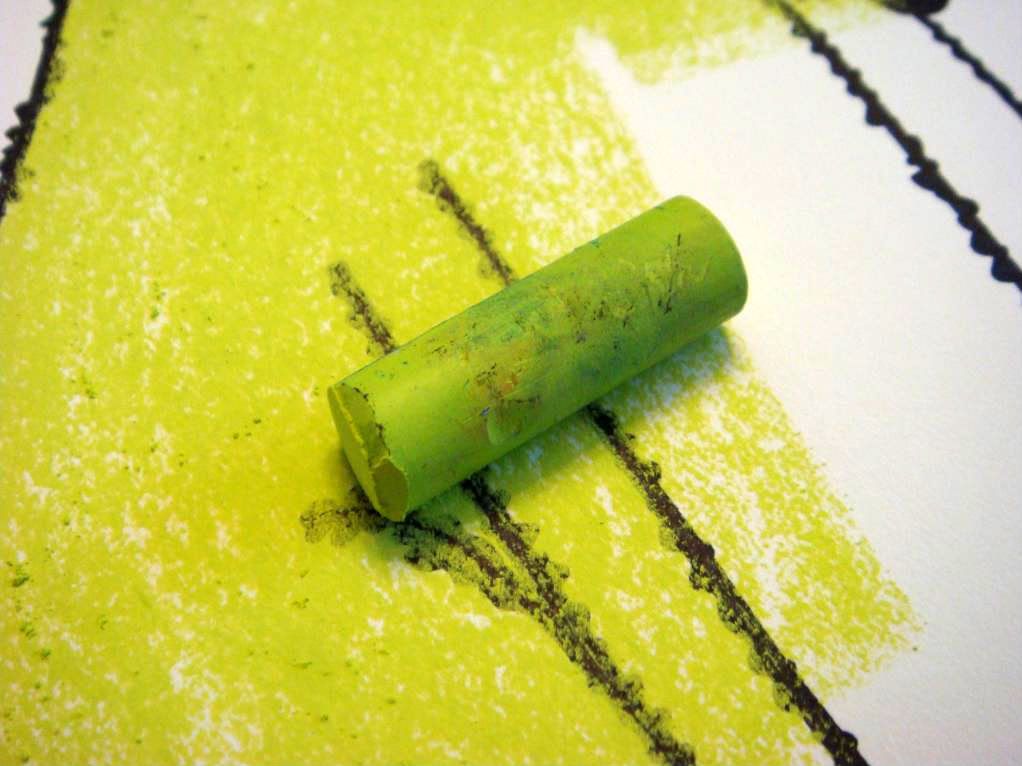
When you're coloring, it's okay color right over the Sharpie marker lines. You will fix this later.

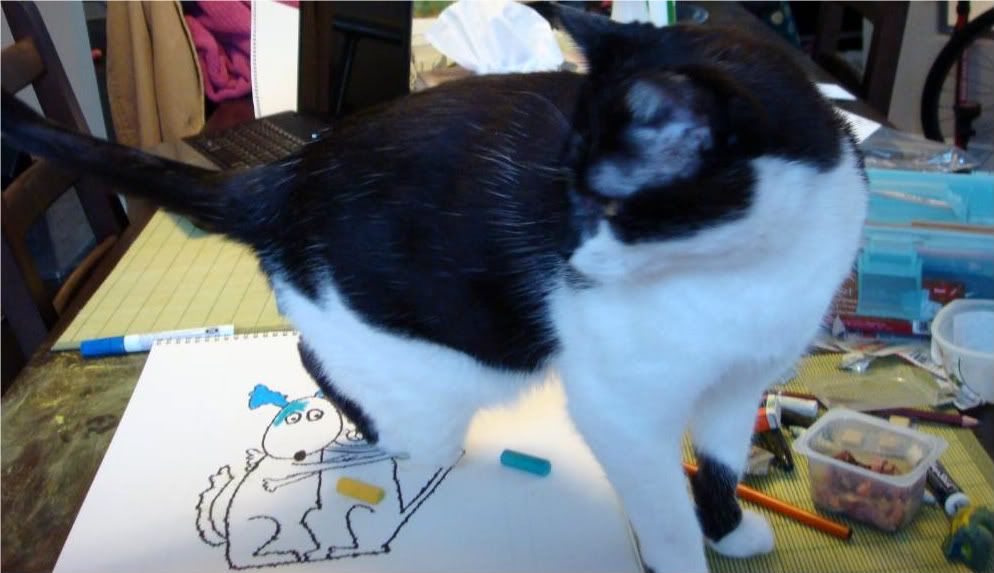
When the cat offers to help, tell him "no thank you" because he's not helpful in the least.

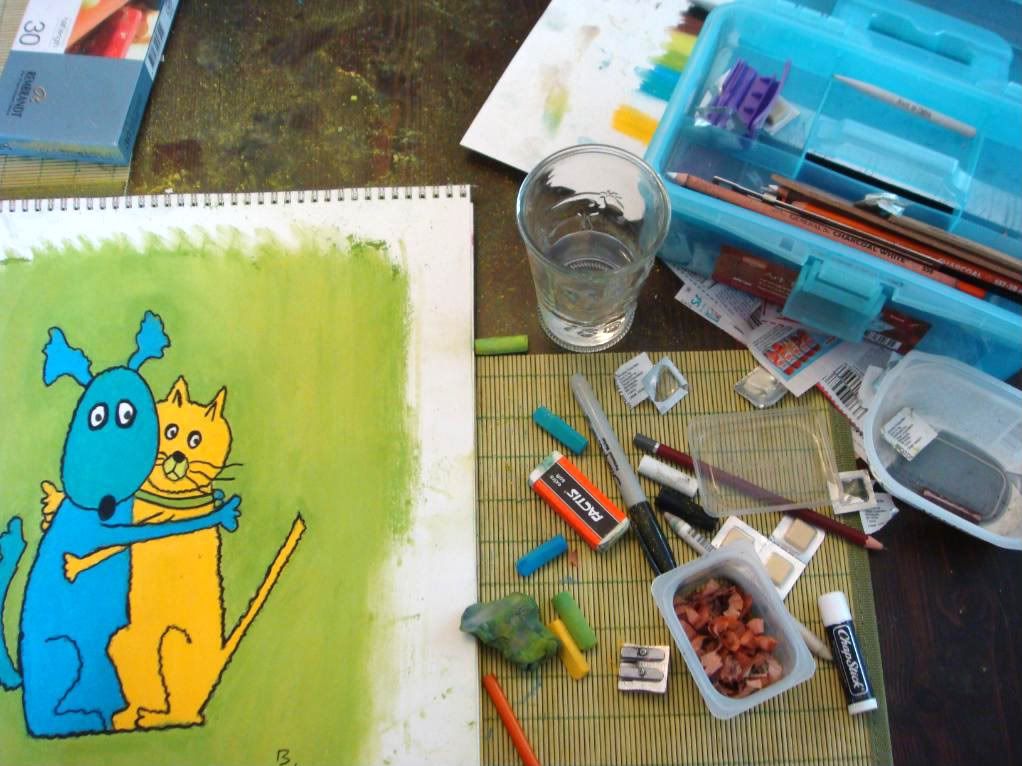
Once you have colored your image, you will need to do some blending. The pastels never cover the page completely (notice how you can see white through the blue dog's head below). It's time to get out your grey rubber eraser. Smash it all up like silly putty and use it to smear around the pastels. It will push the pigment into the paper and give you brilliant color. When it's time to move to an area with a different color, you just knead the eraser, find a clean side, and keep going.
If you have accidentally colored outside of the lines, it's time for the white Factis eraser. This will clean up mistakes, whereas the grey rubber eraser will just smear them.

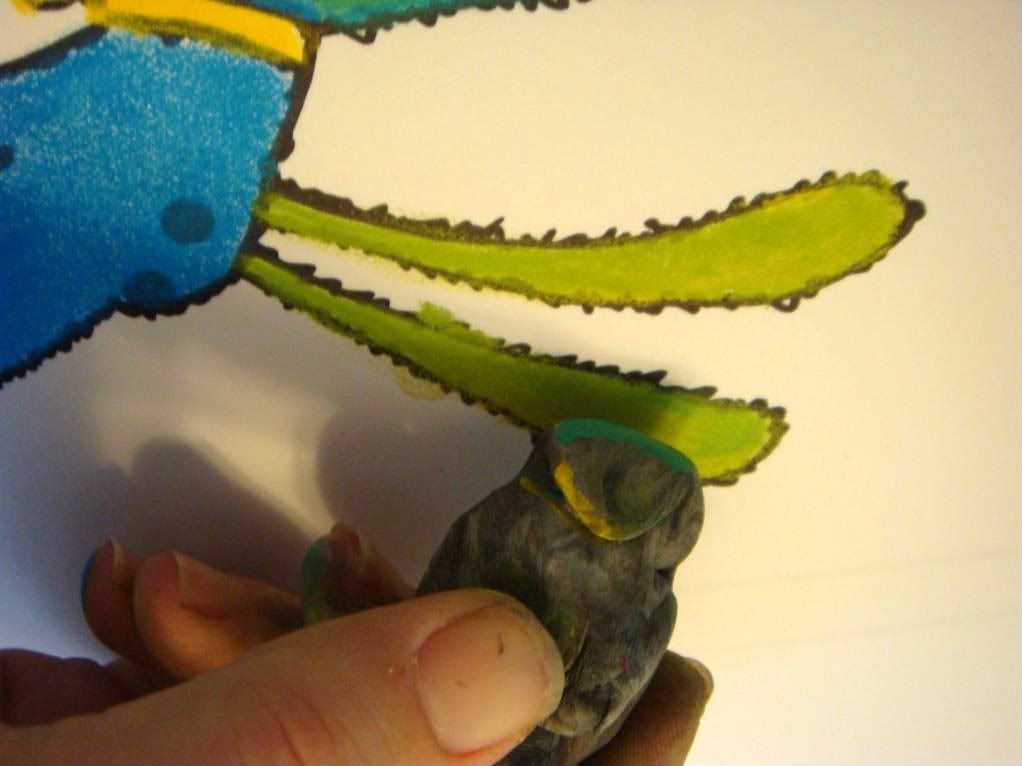
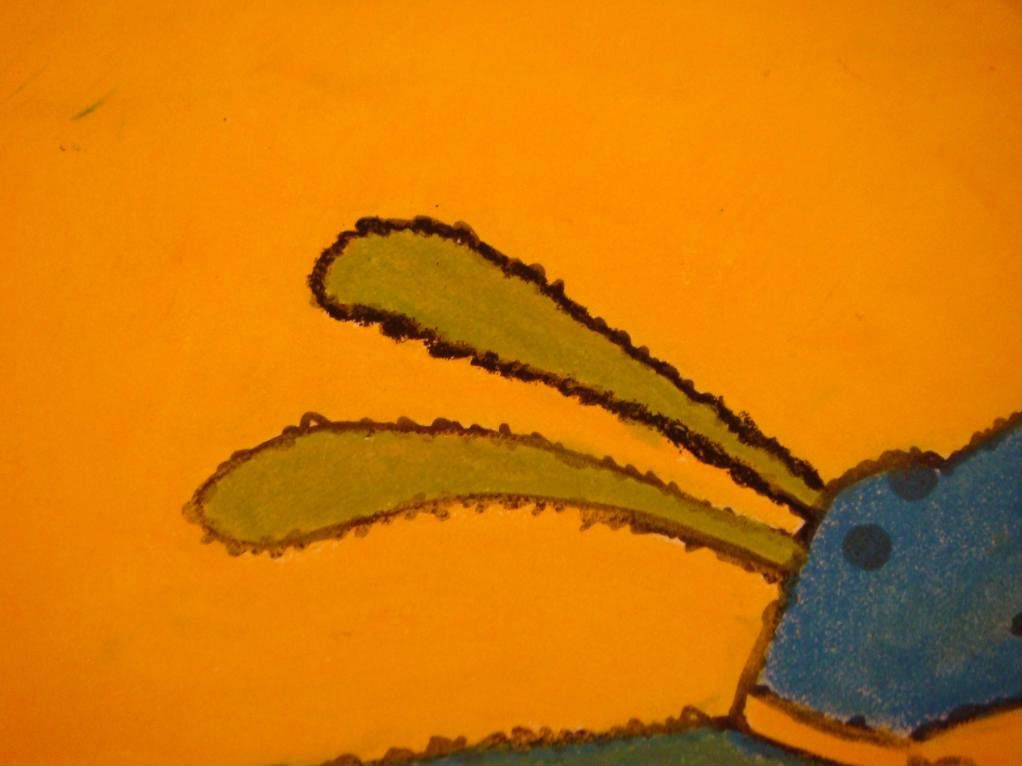
When you're finished coloring the image and the background (and blending with the gum eraser), it's time to get out that charcoal pencil. You now go back and trace over where you originally drew lines with the Sharpie marker. See the difference in the ears below.

Once you're finished with the piece, get out that can of Aqua Net and spray over the image. This will "set" the pastels to preserve the image and prevent smearing.

Time to do the next one!

And the next!

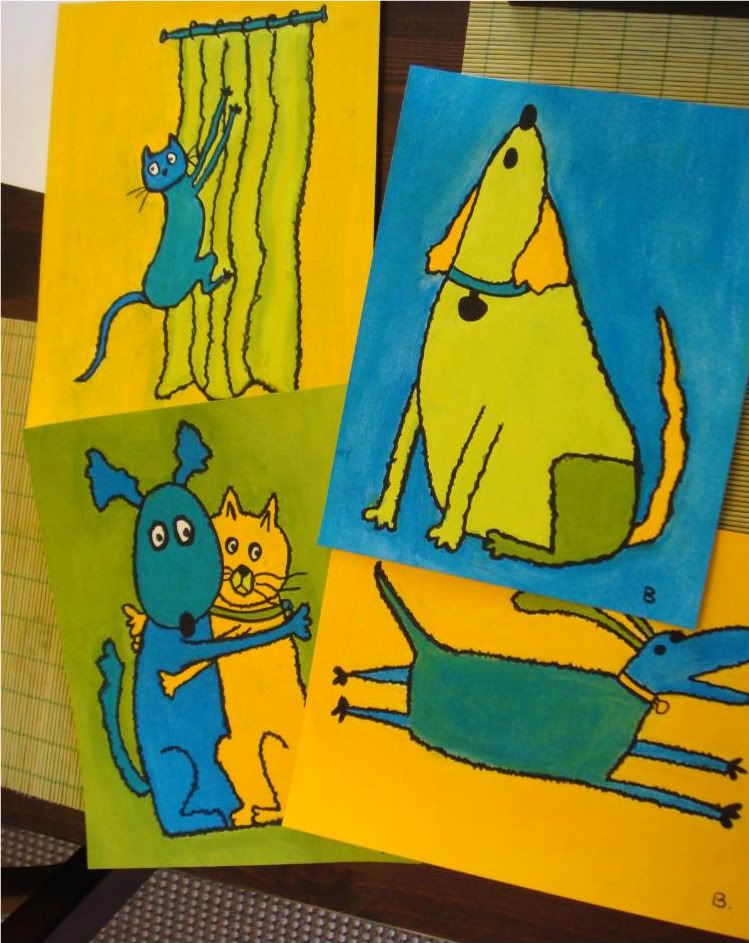
All of the pieces - colored and sprayed.

Time to trim to fit into the frame. If you don't have a papercutter, just work carefully with scissors.

All images, trimmed.

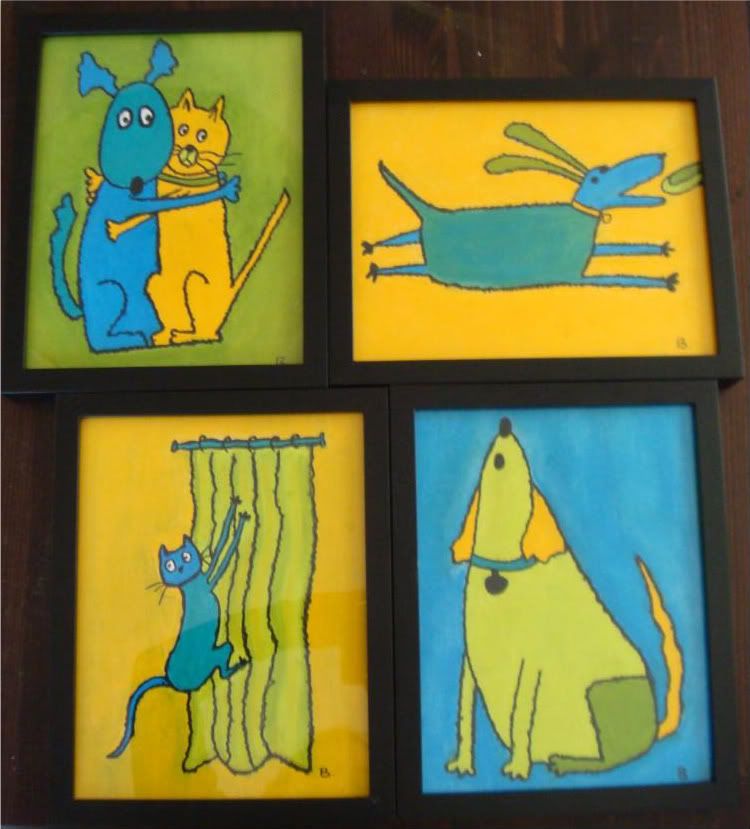
All images, framed.

I probably should have mentioned this is messy project.

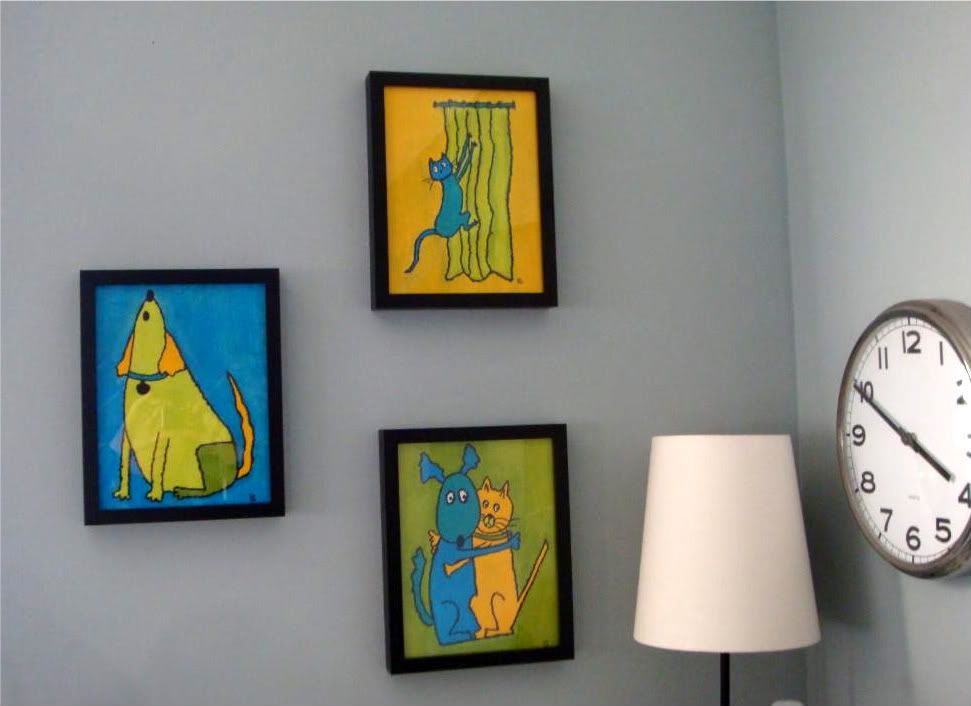
And finally - the art on our walls.


To do this project, you're going to need supplies. Most of this stuff can be found at an art supply store. Start with a pad of paper designed for pastels (ask for help if you're not sure). Remember the size paper should be larger than the piece of art you want to end up with.
You'll also need a box of pastels (sort of like colored chalk, but with much deeper pigments), a charcoal pencil (I used a 6B extra soft), a fine tip Sharpie permanent marker, a gum eraser (these are grey in color and kneadable). It's also helpful to have a white art eraser (I like Factis brand). If you don't already have one, pick up a little pencil sharpener. Perhaps most important, you need a can of cheap hairspray. Aqua Net is the gold standard.
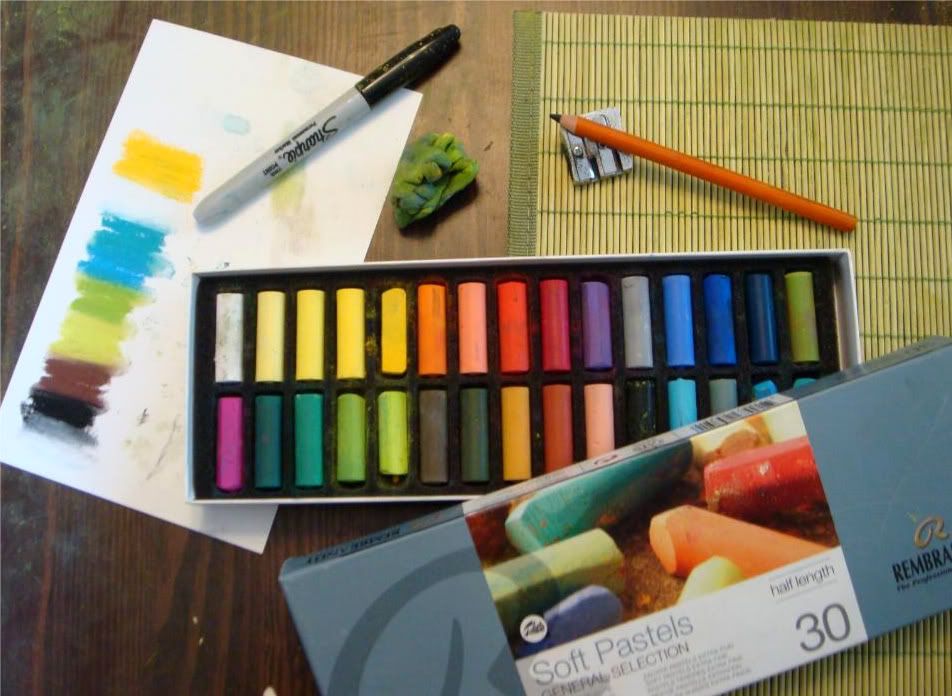
And of course, a set of frames. Ikea has frames that are quite cheap.
If this is your first pastels project, you will be tempted to use every color in the box. This is a mistake. For this project, choose a limited color scheme. I chose 2 blues, 2 greens, yellow and black.
Next find your source of inspiration. I decided to go with a dog and cat motif and found line drawings (clip art) on Google Images. You can also use images from a coloring book or your imagination. It's helpful if your source material is simple line drawings.
Now, create a template - which is the outline of the size of the art you want to make. You'll know this by looking at your frame. Once you know the right size, color the lines with dark Sharpie marker.
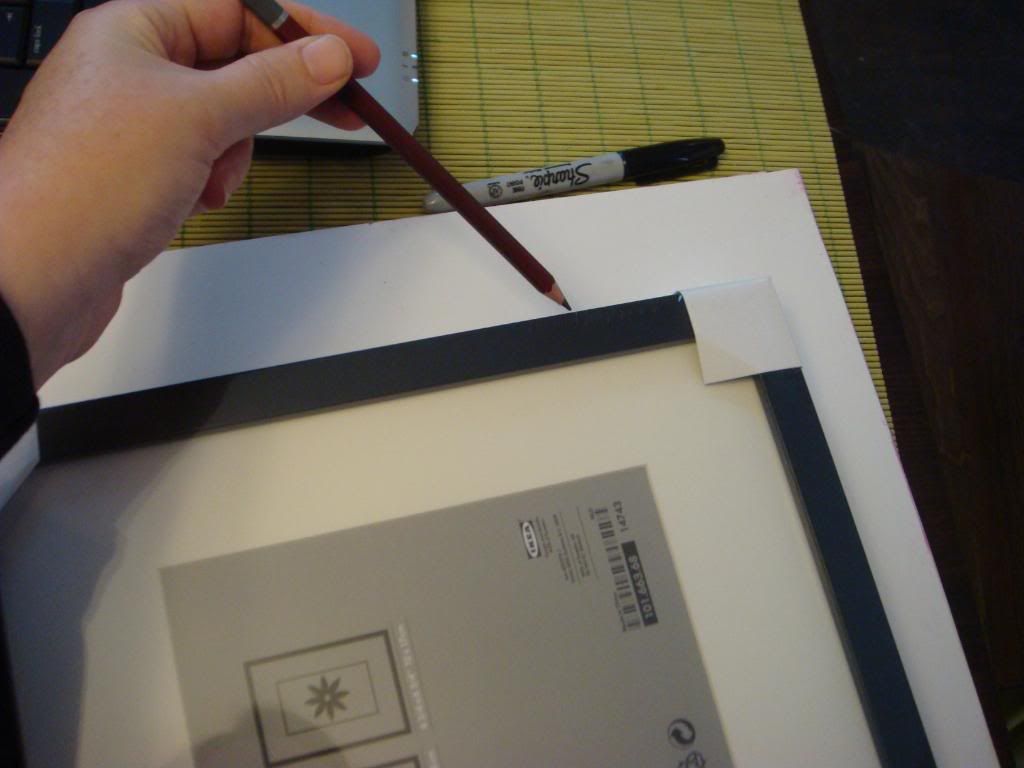
When it's time to draw, you'll slip this template under your paper.
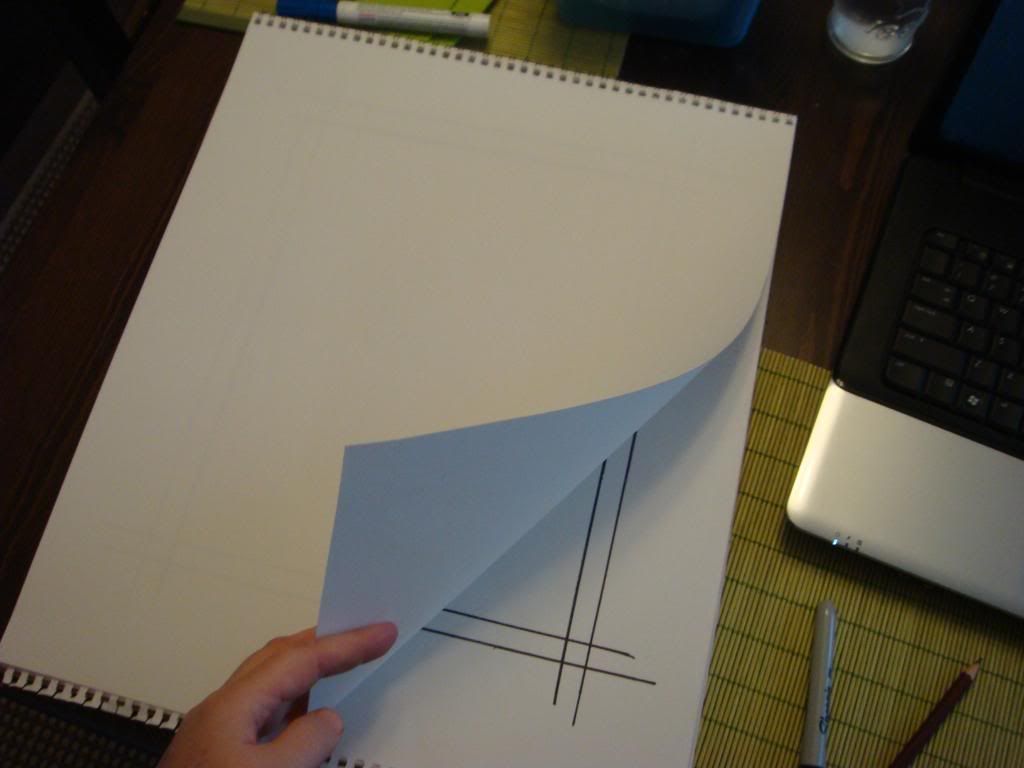
Now, let go of your ego and perfectionism and just do a simple line drawing of your image using your Sharpie marker (DO NOT use the charcoal pencil for this part). As you can see from my sample below, it does not look exactly like the source image, nor should it. Put your personal spin on it. At this point, do not do any shading or color fill. That comes later.
Once you have completed your drawings, slip the template back under the image. It's time to color!
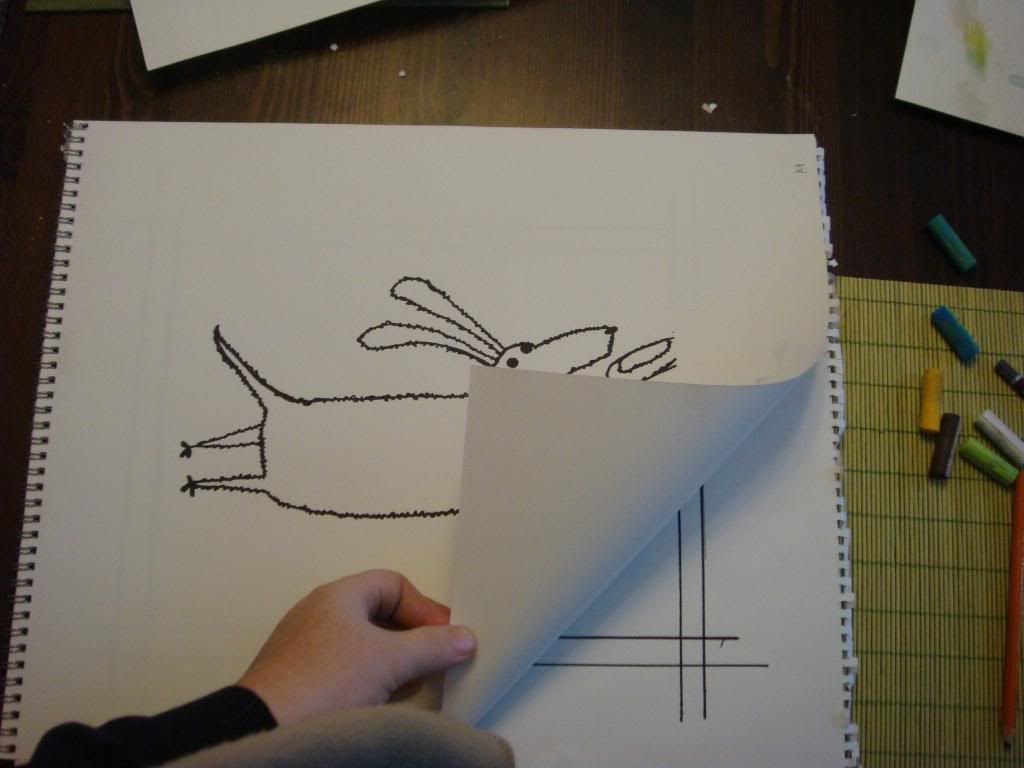
When you're coloring, it's okay color right over the Sharpie marker lines. You will fix this later.
When the cat offers to help, tell him "no thank you" because he's not helpful in the least.
Once you have colored your image, you will need to do some blending. The pastels never cover the page completely (notice how you can see white through the blue dog's head below). It's time to get out your grey rubber eraser. Smash it all up like silly putty and use it to smear around the pastels. It will push the pigment into the paper and give you brilliant color. When it's time to move to an area with a different color, you just knead the eraser, find a clean side, and keep going.
If you have accidentally colored outside of the lines, it's time for the white Factis eraser. This will clean up mistakes, whereas the grey rubber eraser will just smear them.
When you're finished coloring the image and the background (and blending with the gum eraser), it's time to get out that charcoal pencil. You now go back and trace over where you originally drew lines with the Sharpie marker. See the difference in the ears below.
Once you're finished with the piece, get out that can of Aqua Net and spray over the image. This will "set" the pastels to preserve the image and prevent smearing.
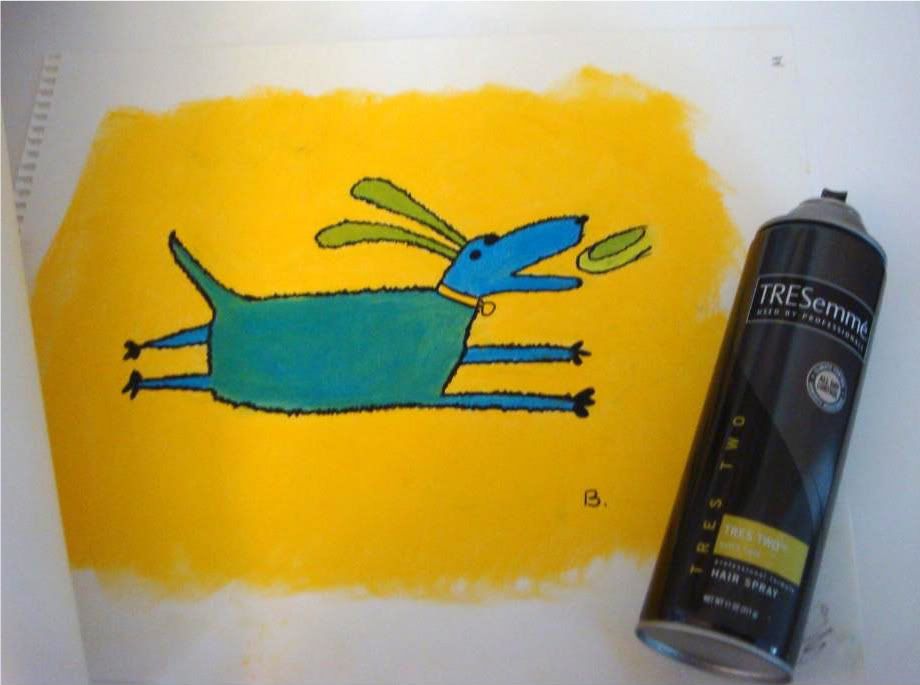
Time to do the next one!
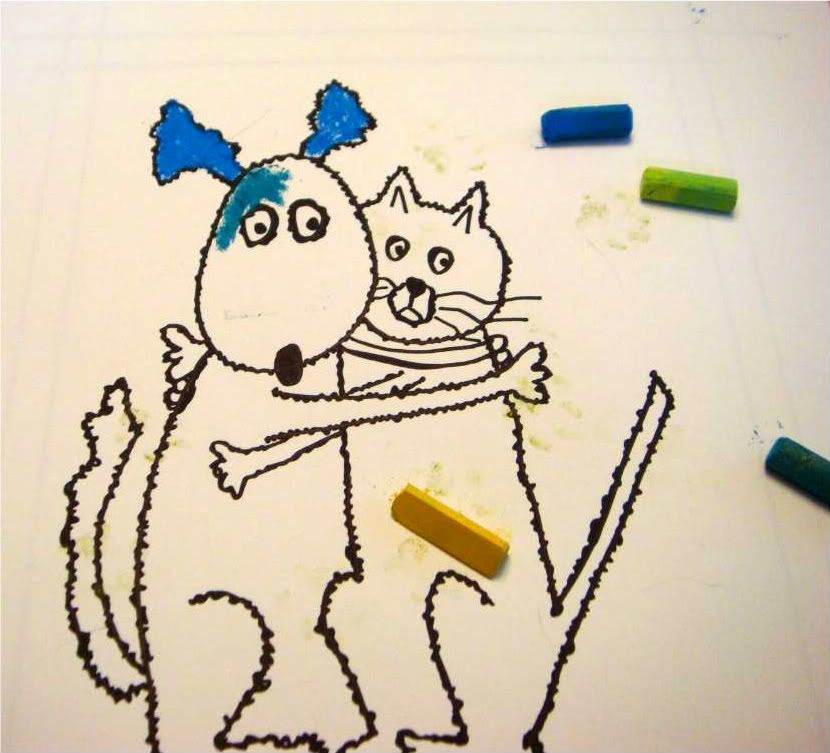
And the next!

All of the pieces - colored and sprayed.
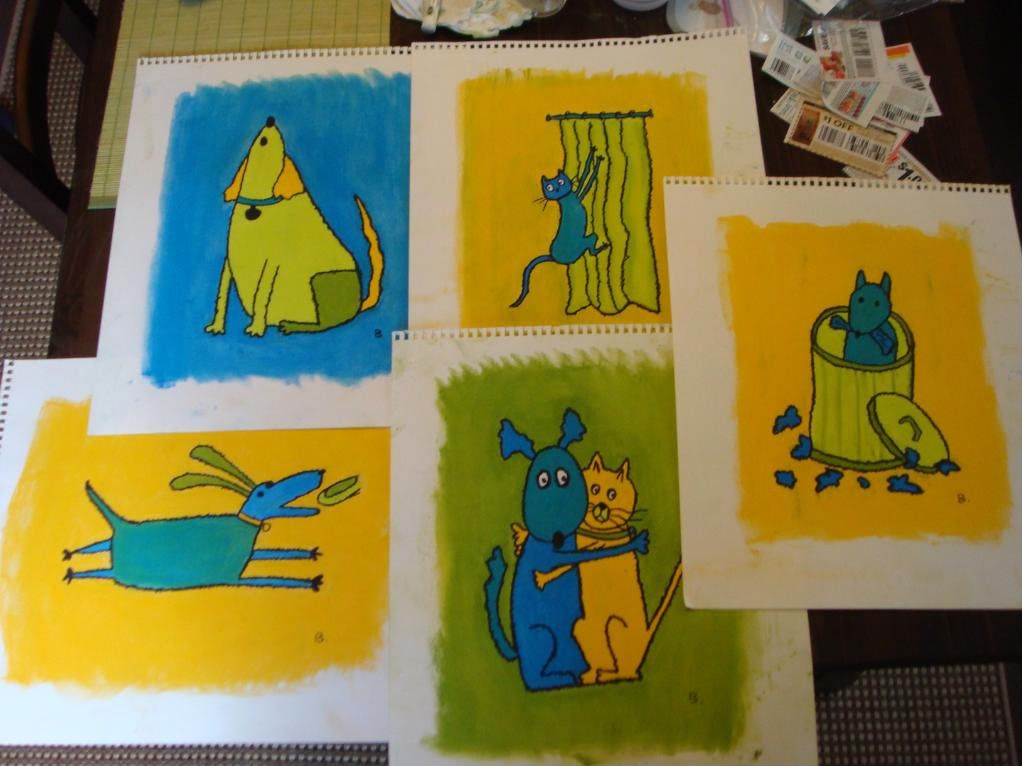
Time to trim to fit into the frame. If you don't have a papercutter, just work carefully with scissors.
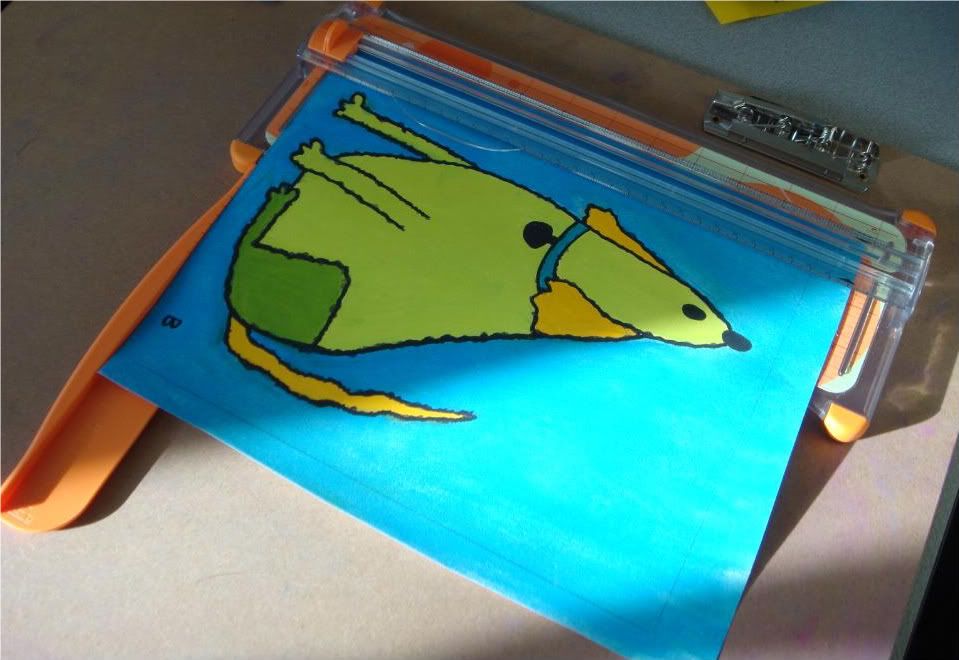
All images, trimmed.
All images, framed.
I probably should have mentioned this is messy project.
And finally - the art on our walls.
Saturday, October 31, 2009
Hug!
Maisey is a true pibble...she loves to give kisses.
By kisses I mean she loves to tackle you and lick your face until it is dripping, or you manage to hide your head under the nearest safe harbor (aka a pillow).
For example:

If you dare make one sound while she's showering you with her affection things get a little dicey. She is so beside herself with love and glee that she starts nipping at your nose (and not in the Christmas-y Jack Frost way...). Don't let the smile on Babs' face fool you, this isn't exactly a desired behavior for a dog as solid as Maisey. The thing is, we had the hardest time training her to get down. She just gets too damned excited to be redirected.
Well, if you can't beat 'em...train 'em to do it on command!
I give you "Maisey, hug."

Yes, we trained our dog to clamber up onto our shoulders and lick away. You would think this would lead to more of the same...out of control licking, a couple nips at the nose.
Nope.
Instead, we combined the lesson in "Masiey, hug" with "Maisey, get down," making sure to give that command way before her head exploded from the exuberance. Her need to be socloseshecancounttheporesonyournose is met and our need for boundaries is met too.
Mission accomplished. Go Team Awesome.
By kisses I mean she loves to tackle you and lick your face until it is dripping, or you manage to hide your head under the nearest safe harbor (aka a pillow).
For example:

If you dare make one sound while she's showering you with her affection things get a little dicey. She is so beside herself with love and glee that she starts nipping at your nose (and not in the Christmas-y Jack Frost way...). Don't let the smile on Babs' face fool you, this isn't exactly a desired behavior for a dog as solid as Maisey. The thing is, we had the hardest time training her to get down. She just gets too damned excited to be redirected.
Well, if you can't beat 'em...train 'em to do it on command!
I give you "Maisey, hug."

Yes, we trained our dog to clamber up onto our shoulders and lick away. You would think this would lead to more of the same...out of control licking, a couple nips at the nose.
Nope.
Instead, we combined the lesson in "Masiey, hug" with "Maisey, get down," making sure to give that command way before her head exploded from the exuberance. Her need to be socloseshecancounttheporesonyournose is met and our need for boundaries is met too.
Mission accomplished. Go Team Awesome.
Friday, October 30, 2009
A Shout Out to My Sisters: Halloween Horrors!
I am a child of the seventies as are, naturally, my sisters. One of our greatest annual rituals was to pull this LP* out of the stack every Halloween:

The B-side** was played on Halloween night for the benefit of the trick-or-treaters. Dad would put one of the enormous stereo speakers in the window for maximum effect. The B-side featured the classic rattling of chains, squeaking of doors, screaming of people, and wacky futuristic space-machine noises.
But the A-side, oh the A-side.
The A-side was a creepy story narrated by a man who had inherited an "antebellum mansion" and was going to visit it for the first time, of course, on Halloween night. Our favorite taglines were the moaning ghost asking "my baby... have you seen my baaaaabeee... MY BAAABEEEEEEEE..." and of course (in re the narrator's car as he makes his narrow escape), "start, darnit it! start!" (such language, hah!) We could, and did, recite the entire story by heart.
A few years ago, my sister Tracy went on an e-bay search for Halloween Horrors and we agreed that if she won the auction, I would buy a turntable*** to play it on. She did, so I did. Not only did we remember the words some 30 years later, but the record still scared the sh1t out of us. The best part was playing it for my niece and nephew, who were just as enthralled in the 2000s as we were in the 1970s.
T & Nette, I salute you and the memory of Halloween Horrors!
PS - Have you seen my baaaaabeeeee?
ETA - Link to the story! Give it a listen!
* for the younger readers, "LP" stands for "Long Play" record, as opposed to a "45" that contained only one song on each side.
** A "B-side" is the "back side" of a vinyl record. You know life is good when you have "time to play B-sides"
*** A "turntable" is a magic machine that played big, black, vinyl records.

The B-side** was played on Halloween night for the benefit of the trick-or-treaters. Dad would put one of the enormous stereo speakers in the window for maximum effect. The B-side featured the classic rattling of chains, squeaking of doors, screaming of people, and wacky futuristic space-machine noises.
But the A-side, oh the A-side.
The A-side was a creepy story narrated by a man who had inherited an "antebellum mansion" and was going to visit it for the first time, of course, on Halloween night. Our favorite taglines were the moaning ghost asking "my baby... have you seen my baaaaabeee... MY BAAABEEEEEEEE..." and of course (in re the narrator's car as he makes his narrow escape), "start, darnit it! start!" (such language, hah!) We could, and did, recite the entire story by heart.
A few years ago, my sister Tracy went on an e-bay search for Halloween Horrors and we agreed that if she won the auction, I would buy a turntable*** to play it on. She did, so I did. Not only did we remember the words some 30 years later, but the record still scared the sh1t out of us. The best part was playing it for my niece and nephew, who were just as enthralled in the 2000s as we were in the 1970s.
T & Nette, I salute you and the memory of Halloween Horrors!
PS - Have you seen my baaaaabeeeee?
ETA - Link to the story! Give it a listen!
* for the younger readers, "LP" stands for "Long Play" record, as opposed to a "45" that contained only one song on each side.
** A "B-side" is the "back side" of a vinyl record. You know life is good when you have "time to play B-sides"
*** A "turntable" is a magic machine that played big, black, vinyl records.
Thursday, October 29, 2009
Mama's Boy
Lucky Bunny's got exactly one trick. He receives kisses upon request. You say "kiss kiss" and he'll lean his sweet forehead in.

Sometimes, he'll ask you for the kiss.
Sweet, sweet boy.


Sometimes, he'll ask you for the kiss.
Sweet, sweet boy.

Subscribe to:
Posts (Atom)


